Quantifying Wear and Service Life of Tooling
The demand for more strength, accuracy, and weight reduction has resulted in an increased need for difficult-to-cut workpieces, such as carbide alloys, hard brittle materials, and quenched steels.
Difficult-to-cut materials put a great load on cutting tools, so particular caution is necessary regarding worn or chipped blades of cutting tools.
KEYENCE's 4K Digital Microscope, which enables observation and measurements that have conventionally been difficult to be carried out, dramatically improves the measurement efficiency of cutting tools and facilitates management and evaluation of tools.
- New Materials and the Evolution of Cutting Tools
- Importance of Tool Wear Inspections
- Management of the Wear and Service Lives of Tools
- Latest Examples of Using Microscopes to Streamline Measurement and Inspection of Tool Wear
- A 4K Microscope That Changes the Measurement and Inspection of Cutting Tools
New Materials and the Evolution of Cutting Tools
Due to increasing demand for parts with reduced weight and higher performance, the need to cut difficult materials such as titanium alloys and CFRP has increased rapidly, particularly in the automotive and aerospace industries. In addition to cutting difficult materials, processes that put a higher load on tooling have been increasing as well. Examples of such processes include high-speed cutting to improve manufacturing efficiency and unmanned continuous cutting carried out over long periods of time. In the semiconductor industry, precision cutting technologies at the level of a few micrometres have also emerged along with the necessity for micro processing.
To meet these requirements, throw-away tools having replaceable blades have been developed for tool bits, drills, and end mills. For throw-away tools, tips made of carbide alloys*, PCD*, or CBN* can be mounted on the blades in order to process difficult-to-cut materials. These types of tools are used in a wide variety of fields because it is only necessary to replace the tip when a blade wears out, thereby reducing maintenance time and cost.
CFRP: An abbreviation of carbon fibre reinforced polymers. It is a composite material of carbon fibre and resin. This material features lower density, lighter weight, and higher strength than iron and aluminium. Unlike metals, CFRP has high elasticity and strength in the fibre direction.
Carbide alloy (WC-Co alloy): Generally called hard metal.It is a composite material in which carbides of IVa, Va, and VIa group metals in the periodic table are sintered with iron-based metals such as Fe, Co, and Ni. It features excellent mechanical properties such as low and high-temperature hardness (HRA of 80 to 94), strength (transverse rupture strength: approximately 2 GPa or more), and Young's modulus (approximately 3 times that of iron).
PCD: An abbreviation of polycrystalline diamond. It is an artificial mineral produced by sintering diamond microcrystals together with metal and ceramic powders at high temperature and pressure. While natural diamonds are monocrystalline, diamonds contained in PCD are polycrystalline and have excellent thermal conductivity and hardness.
CBN: An abbreviation of cubic boron nitride. It is a compound that consists of boron and nitrogen and does not exist in nature. It is the hardest material next to diamond. As for the heat resistance temperature, PCD starts to oxidise at about 700°C while CBN starts to oxidise at about 1300°C, which means that CBN is more suitable for processing under high temperatures.
Importance of Tool Wear Inspections
Worn or chipped tool blades not only affect the accuracy and speed of processing but also cause deformation and breakage of workpieces due to increased blade temperatures. Worn or chipped tool blades also lead to processing machine failures. Hence, the observation of blades to understand their states is directly related to the performance of the cutting process.
For example, throw-away tips—the blades of PCD and CBN tools, which excel at processing difficult-to-cut materials—have a rake surface for discharging chips and a flank surface for preventing the tip from coming into contact with the cutting surface, and the accuracy of the angles of these surfaces directly influences the processing accuracy. If you continue to use a tip that has crater wear or flank wear, the cutting accuracy decreases, leading to defective products.
Regular inspection and management of tool wear make it possible to establish timelines for preventative maintenance of cutting tools, reducing costs and improving yield rate.
Management of the Wear and Service Lives of Tools
The service lives of tools vary depending on the cutting conditions, such as the material of workpieces, the processing method, the processing speed, and the rotation speed. For example, setting a higher rotation speed to increase the feed amount of the tool bit increases not only the processing speed, but also the load on the blade, leading to larger wear. Conversely, setting a lower rotation speed to decrease the feed amount of the tool bit increases the service life of the blade, but slows the processing speed.
Cutting must be carried out under optimal conditions that balance the processing speed and the blade service life. Using microscopes to observe and quantify tooling wear can be an effective means to increase the lifespan of tooling and production efficiency.
Latest Examples of Using Microscopes to Streamline Measurement and Inspection of Tool Wear
Tooling wear is most commonly quantified through 2D, 3D and radial measurements.
Fully focused observation and measurement of tools and products
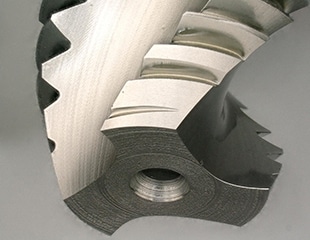
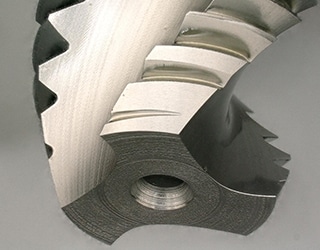
Tool blades have deep, three-dimensional shapes that require wear inspection across the entire surface. Conventional microscopes are only able to focus on a portion of the target, and the focus must be continuously adjusted to inspect the entire surface.
The VHX Series 4K Digital Microscope is equipped with a depth composition function that enables the entire target to be brought into focus. The eucentric design enables tilted observation from any angle, without having to adjust the sample. The tilt angle can be locked to allow for inspection of multiple different samples at the same angle for easy comparison.
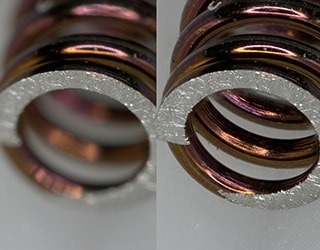
Left: normal, right: real-time depth composition
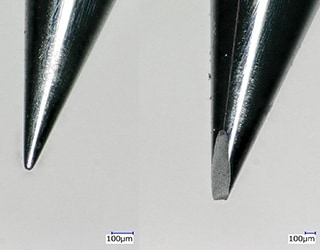
Observation and measurement unaffected by reflective surfaces
Tooling is made of polished metals and the surface of their cutting tips are highly reflective. Such surfaces cause strong reflected light, which generates glare that hinders observation and measurement.
The VHX Series is equipped with a glare removal function and an HDR function to achieve high-quality images on highly-reflective surfaces that have little contrast.
The ring-reflection removal function removes ring-shaped reflections on the target surface, which have conventionally been difficult to remove. Capturing several images with different light-source directions prevents image overexposure.
Also, the HDR (High Dynamic Range) function captures multiple images at varying shutter speeds to obtain an image with high colour gradation. This enables observation at previously unattainable levels of accuracy and contrast.
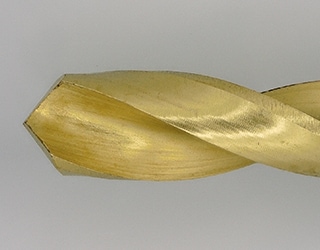
Enable imaging without glare
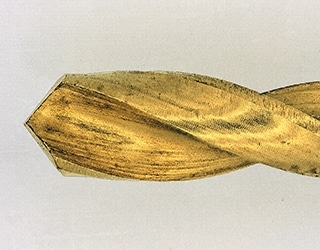
enable imaging with enhanced metal surface textures
Observation and 2D/3D measurements of wear
End mills and drill tips have deep shapes that need to be inspected using both 2D and 3D measurements.
The VHX Series supports 2D and 3D measurement with just a few clicks. Measurements can be performed from any angle, and the system even compensates for vibration that would otherwise create a blurry image.
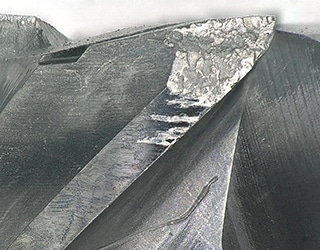
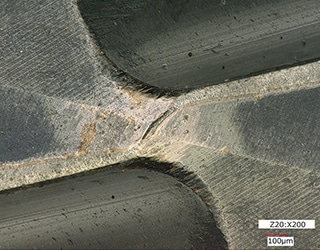
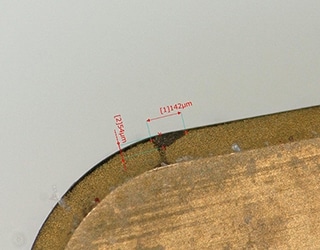
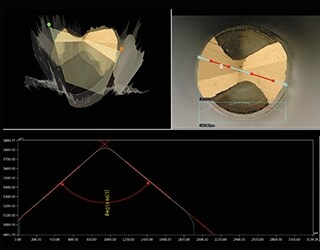
profile measurements of a drill tip
Observation and measurement of a diamond tool
Diamond tooling (PCD) are best suited to processing and finishing of carbide alloys, fibre reinforced plastics (FRPs) and carbon fibre reinforced plastics (CFRPs). They also feature high wear resistance and long service life compared to conventional carbide alloy tools. On the other hand, if the blade temperature reaches about 700°C, diamond carbon atoms are absorbed (oxidised) by iron, causing severe wear on the PCD.
You can perform profile measurement by using the 3D composition function of the VHX Series 4K Digital Microscope. This function enables users to understand the surface shape of a PCD tool, and to measure not only chipping, but also micron-level wear.
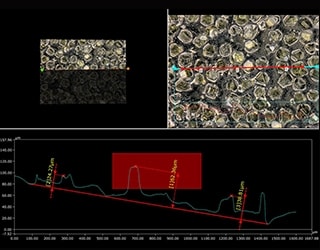
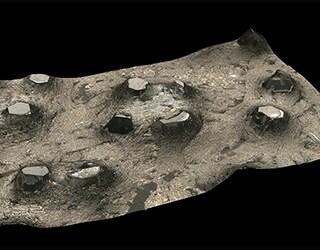
Tooling cycle management
Managing the lifespan of tooling is indispensable for stable manufacturing. In some cases, it is also necessary to review the cutting conditions. Tips of cutting tools need to be managed with accuracy in units of micrometres, and it is also important to distinguish between wear and adhered chips or foreign particles.
The VHX Series 4K Digital Microscope offers magnifications from 0x to 6000x. With the VHX Series 4K Digital Microscope, minute cracks and defects can be observed. Additionally, at high magnification users can distinguish true wear from foreign particles adhered to the surface.
Long-term observation of the state of tooling allows users to understand the progress of wear, and as a result can extend the tooling service life by deriving optimal cutting conditions.
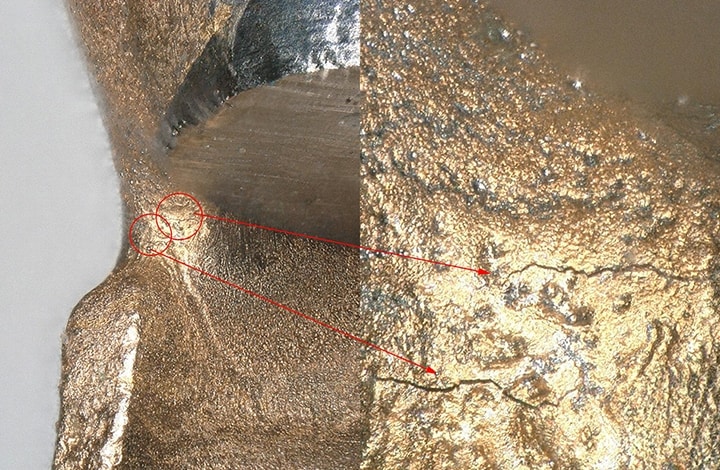
- Left: standard magnification
- Right: high magnification
A 4K Microscope That Changes the Measurement and Inspection of Cutting Tools
The VHX Series is a powerful tool that solves problems in conventional measurement and inspection and improves work efficiency.
The VHX Series is equipped with a variety of functions that strongly support observing and analysing tooling; including a free-angle tilt system to observe targets from any angle, glare removal to ensure accurate inspection, and depth composition so the entire target can be brought into focus and inspected.
For additional product info or inquiries, click the buttons below.


