- Home
- Solutions
- Case Studies
- KEYENCE VHX-970F Microscope Proves that Knowledge is Power at TDK-Lambda UK
KEYENCE VHX-970F Microscope Proves that Knowledge is Power at TDK-Lambda UK
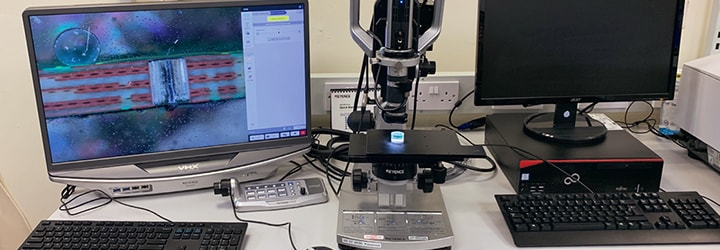
TDK-Lambda UK, a major manufacturer of power supplies to markets such as medical and industrial, is taking advantage of a newly installed KEYENCE VHX-970F high-accuracy digital microscope to drive the company’s inspection and quality function. With such a reputable global brand, there is no margin for failures.


Part of Japanese multinational electronics giant TDK Corporation, TDK-Lambda UK is Britain’s largest designer and manufacturer of both standard and configurable AC-DC and DC-DC power supplies. The company’s 350-employee facility in Ilfracombe is home to its manufacturing, new product development, sales and service functions. A key part of delivering business success at TDK- Lambda UK is component engineering.
“As a department, we’re responsible for component analysis; looking at alternative or new components that we test for robustness and conformity to data sheet specifications,” explains Component Engineering Manager Dan Massey. “We also look after supplier quality from our contract manufacturers, while further responsibilities include goods inwards, sample inspection and compliance with RoHS.”
TDK-Lambda UK’s previous KEYENCE microscope served the company well for around 15 years but it upgraded to keep pace with the latest innovations and improvements.
“We saw the KEYENCE VHX-970F high-accuracy digital microscope and knew it would meet our requirements,” says Massey. “Also, staying with KEYENCE meant we could continue using our existing lenses. It was an easy choice.”
As an option, the company invested in a digitally controlled Z-axis for the VHX-970F that it did not have previously.
“It allows us to automate the focus, assisting ease of use,” he says. “Supported by the microscope’s impressive depth of field we can also use the digitally controlled Z-axis to take multiple images from different height perceptions if we have a particularly awkward or complex component to inspect.”
The KEYENCE VHX-970F has three main roles on site at TDK- Lambda UK. Firstly, to discover the cause of failures in new or alternative components prior to allowing their use in production, the company will encase the part in a clear resin before using fine polishing paper to grind down through the component and inspect it at each step under the microscope. The objective is to identify cracks, burn marks or any other suspicious internal flaws.
“We also use it for inspecting wire crimps, making sure we have the correct compression and right fill in the crimp barrel,” explains Massey. “Using the VHX-970F provides exceptionally reliable results because of the ultra-high resolution it can provide, while its ultra- fast frame rate is much quicker and easier than performing a physical pull test on the crimp.”
Thirdly, the VHX-970F checks factors such as solder fill on the company’s PCDAs (power control and distribution assemblies).
APPLICABLE PRODUCT CATALOGUE

